
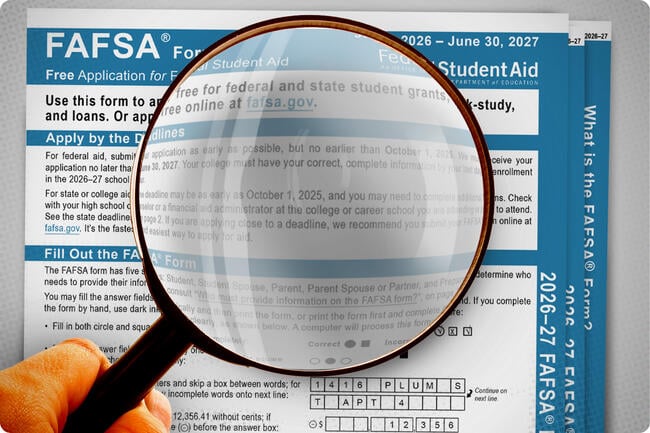
Start with your FSA ID
Before you can access the 2026 FAFSA form, you must create an FSA ID. This username and password combination serves as your legal electronic signature for all federal student aid documents. Without it, you cannot log in to complete the application or sign it.
The FSA ID acts as your unique digital key. It is required for both students and parents who are contributing to the form. If you already have an FSA ID from a previous year, you can use it, but you must verify that your contact information is current. Outdated phone numbers or email addresses can lock you out of the process during identity verification.
To create a new ID, visit the official FSA ID website. You will need your Social Security number, your U.S. citizenship or eligible noncitizen status, and a valid email address. Once created, you will receive a confirmation email. Click the link in that email to activate your account.
Before creating your ID, ensure you have your Social Security number and proof of citizenship or eligible noncitizen status ready. You will need these to verify your identity during the FSA ID creation process.
Go to the FSA ID website and click "Create an FSA ID." Enter your personal information, including your name, date of birth, and Social Security number. Create a strong password and answer two security questions.
After submitting your information, you will receive a confirmation email. Click the link in the email to activate your account. If you do not have a U.S. passport or driver's license, you may need to use alternative identity verification steps, which can take longer.
Once your FSA ID is active, you are ready to begin the FAFSA. Treat your FSA ID like a bank login—keep it secure and do not share it with anyone.
If you encounter issues during creation, such as being unable to verify your identity, visit the Federal Student Aid website for troubleshooting steps. Common problems include mismatched names or outdated contact information. Resolving these early prevents delays in your financial aid timeline.
Gather financial documents
Before you start entering data, collect the paperwork that proves your income and assets. The new FAFSA rules require specific tax information that differs from previous years. Having these documents ready prevents you from pausing to search for files or guessing at numbers, which often leads to errors and delays in processing.
Keep the following items within reach as you fill out the form:
- IRS Tax Return transcripts: The FAFSA now uses the Direct Data Exchange to pull tax data directly from the IRS. You will need to authorize this transfer, but having your actual tax return on hand helps if you need to verify specific figures or if the system fails to sync correctly.
- Bank statements: You will need to report the current balance of checking, savings, and investment accounts. Gather statements for all accounts held by the student and parents (if the student is dependent) as of the date you submit the form.
- Records of untaxed income: This includes child support received, worker’s compensation, and tax-free interest. Keep summaries or receipts for these amounts, as you will need to enter them manually.
- Social Security numbers: Ensure you have valid SSNs for the student, parents, and any other contributors. Aliens without SSNs must have an Alien Registration Number ready.

Organize these documents in a single folder or envelope. This simple step keeps the process focused and ensures you don’t miss a required field when the new income rules come into play.
Enter student information
The FAFSA form starts with the student’s personal details. You will need your Social Security number, date of birth, and citizenship status ready. This section establishes your identity and eligibility baseline before moving to financial data.
Personal and demographic data
Begin by entering your legal name exactly as it appears on your Social Security card. If you have a legal name change, upload the documentation now. Next, provide your mailing address and email address. This email is critical for receiving updates and your Student Aid Index (SAI) results, so check it regularly.
Enter your Social Security number, date of birth, and citizenship status. Ensure these match federal records to avoid processing delays.
Provide your current mailing address and a reliable email address. This is where the National Student Loan Data System will send your aid updates.
Answer questions about your gender, race, and ethnic origin. These are used for federal reporting and do not affect your financial aid eligibility.
The new 2026 income: what to check next
The 2026–27 FAFSA simplifies how income is reported. You no longer need to manually enter tax returns or calculate adjusted gross income. Instead, the form uses a direct data exchange with the IRS.
When you reach the income section, select the option to authorize the transfer of tax data from the IRS. This pulls your adjusted gross income, taxes paid, and untaxed income directly into the form. If you did not file taxes, you will still need to provide manual income estimates, but the process is streamlined.
This change reduces errors and speeds up the submission process. Make sure you have your IRS login credentials ready if you choose to authorize the data transfer. If you encounter issues with the IRS data exchange, you can switch to manual entry, but this may extend your processing time.
Parent and guardian information
If you are a dependent student, you must enter your parents’ information. This includes their names, Social Security numbers, and demographic details. The form will then ask for their financial information, following the same simplified income rules as the student section.
If your parents are divorced or separated, you only need to enter the information for the parent who provided more financial support in the last 12 months. This is known as the "contributing parent." The other parent’s information is not required for your FAFSA.
Review and save
Before submitting, review all entered information for accuracy. You can save your progress and return later if needed. However, it is best to complete the form in one session to ensure all data is consistent.
Add schools to your list
Finding the right college is only half the battle; the other half is ensuring they actually see your financial aid data. The FAFSA process allows you to list up to 100 schools on a single application, giving you the flexibility to cast a wide net without penalty. Whether you are targeting safety schools, reach schools, or financial safety nets, there is no limit to the number of institutions you can include.
Start by gathering the Federal School Code for every college on your list. These codes are unique identifiers that tell the Department of Education where to send your information. You can find these codes quickly using the Federal School Code Search tool on the StudentAid.gov website. Having these codes ready before you log in will save time and prevent errors during the submission process.
Once you are in the FAFSA form, navigate to the "Schools" section. Enter the Federal School Codes one by one. The system will automatically verify each code against the official database. You can add schools in any order, and you do not need to prioritize them by preference at this stage. The FAFSA itself does not rank your choices; that comes later in the financial aid offer comparison process.
Remember that adding a school does not guarantee aid, but it is the only way to be considered for federal grants, loans, and work-study programs. Some states and individual colleges also require the FAFSA for their own institutional scholarships. By listing every school you might attend, you ensure you do not miss out on potential funding opportunities. If you change your mind about a college after submitting, you can usually add or remove schools before the priority deadline.
Review and sign the FAFSA form
Before submitting, you need to verify every section of your 2026 FAFSA form. This is your final chance to catch errors or update information before the new income rules are applied. Take your time to read through each page carefully.
Verify your information
Log in to your FSA ID at studentaid.gov. Navigate to the "My FAFSA" dashboard and click on the FAFSA form you just completed. Review the Student Data Release Section and the Signatures section. Check that your name, Social Security number, and dependency status are correct. If you made changes after the initial submission, ensure those updates are reflected.
Sign as the student
You must electronically sign the form using your FSA ID. This confirms that the information you provided is accurate and that you understand the terms of federal student aid. If you haven't created an FSA ID yet, you will need to do so before you can sign. The process is quick, but you should allow time for identity verification if you have trouble logging in.
Get contributors to sign
If you are a dependent student, one or both of your parents or your spouse may need to sign as contributors. They will receive an email with a link to their portion of the form. They must also use their own FSA ID to sign. If a parent cannot or will not provide an FSA ID, you may need to submit an exception request, which can delay your application.
Submit the form
Once all required signatures are in place, click the "Submit" button. You will receive a confirmation page and an email receipt. Save this confirmation for your records. Your Student Aid Index (SAI) will be calculated and available in your FSA ID account within a few days. If you see errors or warnings, address them before considering the process complete.
Check your SAR for errors
Your Student Aid Report (SAR) is the confirmation receipt for your FAFSA. It lists the data you submitted and calculates your Expected Family Contribution (EFC). You must review this document carefully to ensure your financial aid is accurate.
You will receive your SAR via email within three days of filing. If you submitted a paper form, it may take up to two weeks. Log in to your FSA ID to view and print a copy immediately.
Review your personal information
Start with the basics. Check your name, Social Security number, and date of birth against your government-issued ID. Even a small typo in your name can delay your aid or cause it to go to the wrong student.
Verify your financial data
The SAR summarizes the income and asset data you reported. If you used the IRS Data Retrieval Tool (DRT), double-check that the numbers match your actual tax return. If you entered data manually, compare it line-by-line with your W-2s and tax transcripts. If you filed a separate return or have special circumstances, ensure those selections are correct.
Fix mistakes before the deadline
If you spot an error, do not wait. You can correct the SAR directly on the FAFSA website. Navigate to the "View Your SAR" section and select "Make Corrections." Update the incorrect fields and resubmit. Your schools will receive the updated information automatically. If you are unsure how to correct a specific field, contact your school's financial aid office for guidance.
Visit studentaid.gov and sign in with your FSA ID to access your submitted application.

Locate the "View Your SAR" link on your dashboard and download the PDF for your records.

Compare every field against your original documents, focusing on names, SSNs, and income figures.
If errors exist, use the "Make Corrections" button to update the data and resubmit the form.
Common FAFSA mistakes to avoid
Even with the simplified 2026 FAFSA, small errors can delay your financial aid or reduce your award. Students and parents often stall at the same checkpoints. Fix these issues before you submit.
Review your signature status. Both the student and relevant parents must sign with their FSA IDs. An unsigned form is incomplete. Keep a PDF copy of your confirmation page for your records.
No comments yet. Be the first to share your thoughts!