
Prepare your FSA ID and documents
Before you begin the FAFSA® form, you need two things: a valid FSA ID and a folder of personal records. Without these, you will hit immediate roadblocks. The federal government requires an FSA ID to sign the form electronically, acting as your legal password. You also need specific financial and demographic data to fill in the questions accurately.
Create your FSA ID early
Your FSA ID is your gateway to the FAFSA. It consists of a username and password that allow you to log in to Department of Education websites and sign your application. If you are a dependent student, your parent will also need their own FSA ID to sign the form on your behalf.
You can create an FSA ID at studentaid.gov. Make sure to use a current email address and a strong, unique password. If you already have an FSA ID from previous years, log in to verify that your information is still current.
Gather required documents
Having the right paperwork ready prevents you from having to pause and search for items mid-form. Keep the following documents on your desk or open in a separate browser tab:
- Social Security number (or Alien Registration Number if you are not a U.S. citizen).
- Federal income tax returns, W-2s, and other records of money earned for the prior-prior year.
- Records of untaxed income, such as child support received or interest income.
- Bank statements and records of investments, including stocks, bonds, and real estate (excluding your primary home).
- List of colleges you are considering. You can add up to 20 schools at a time.
Having these items ready ensures you can complete the FAFSA in one sitting, reducing the chance of errors or forgotten fields.
Enter student and family information
The first section of the 2026-27 FAFSA form is where you establish who you are and who supports you. This part determines your dependency status, which is the single most important factor in how your financial aid is calculated. If you are considered dependent, your parents' financial data is required; if independent, it is not. Getting this right early prevents errors later.
Determine your dependency status
Answer the dependency questions honestly. The FAFSA uses specific criteria to decide if you are dependent or independent, regardless of whether your parents contribute to your college costs. Common independent statuses include being married, a veteran, an orphan, or having legal dependents other than a spouse. If you are unsure, the form will guide you through the logic. Federal Student Aid provides a detailed breakdown of these criteria.
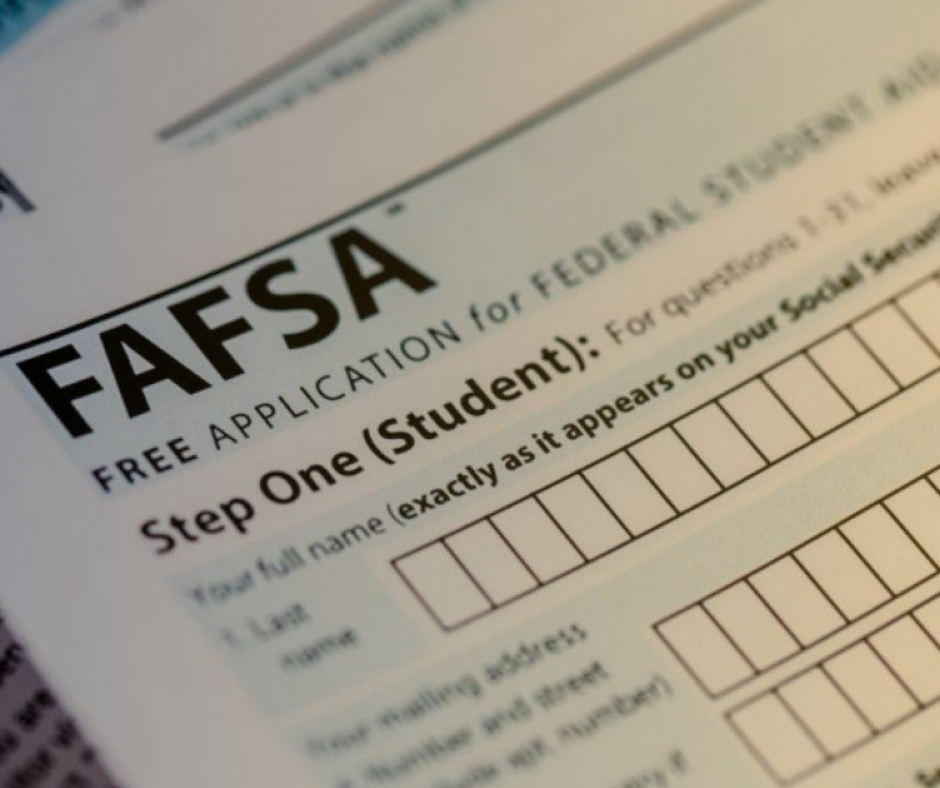
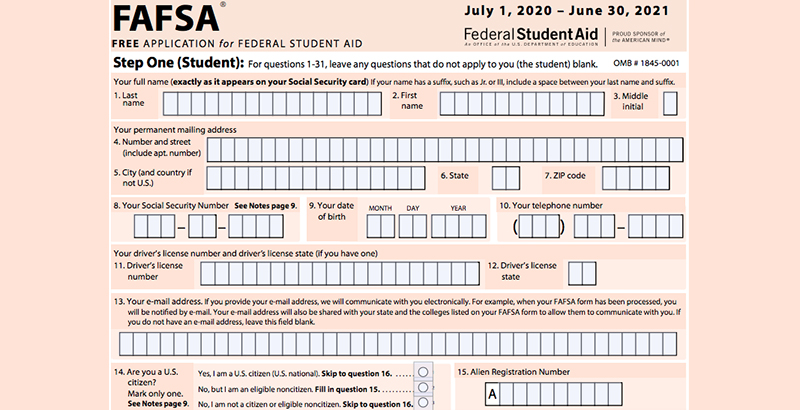
Enter personal demographics
Once your dependency status is set, you will enter basic identifying information. This includes your legal name, Social Security Number, date of birth, and citizenship status. Ensure your name matches your Social Security card exactly. Mismatches here can delay the processing of your application or cause identity verification failures. You will also select your high school completion status, such as a diploma, GED, or homeschool completion.
Provide contact and residency details
This section collects your current address and intended college information. You can list up to ten colleges to receive your FAFSA data. If you haven't decided on a school, you can use the school's federal code for a placeholder institution. Accurate residency information is also required for state aid eligibility, so double-check your state of legal residence. This data helps determine if you qualify for state-specific grants or in-state tuition rates.
Review and save
Before moving to the next section, review the information you have entered. The FAFSA form allows you to save your progress, so you do not need to complete the entire application in one sitting. However, ensure that the dependency status and demographic data are correct before saving, as changes later may require re-verification. This step locks in your identity and dependency classification for the rest of the application.
Input financial data and signatures
The financial section is the heaviest part of the FAFSA form. It requires detailed records of income, assets, and household size. Treat this section like a tax audit preparation. You will need W-2s, bank statements, and records of untaxed income for the prior-prior tax year.
Gather your documents
Before you start, collect the following items. Having them ready prevents errors and saves time:
- Your Social Security number (or Alien Registration number if you are not a U.S. citizen).
- Federal income tax returns, W-2s, and other records of money earned for the prior-prior year.
- Bank statements, investment records, and net worth information.
- Records of untaxed income, such as child support received or interest income.
Enter financial information
You can enter your financial data manually or use the IRS Data Retrieval Tool (DRT). The DRT pulls data directly from your tax return, which reduces errors and speeds up the process. If you cannot use the DRT, you must enter the numbers exactly as they appear on your tax return.
Review and submit
Once you have entered all financial data and added your signatures, review the entire form. Check for any red flags or missing information. If you see a warning, click on it to fix the issue. When you are ready, submit the form. You will receive a confirmation email with your FAFSA submission ID. Keep this ID for your records.
What happens next?
After you submit, the Department of Education will process your data. This usually takes a few days to a week. You will receive a Student Aid Index (SAI) number, which replaces the Expected Family Contribution (EFC). Colleges use your SAI to determine your financial aid package. You can check your status on studentaid.gov.
Review your Student Aid Report
Your Student Aid Report (SAR) is your first look at the data the Department of Education received from your FAFSA. Think of it as a confirmation receipt rather than a final financial aid award. It summarizes the information you entered and calculates your Student Aid Index (SAI), which schools use to determine your eligibility for federal grants, loans, and work-study.
You can view and print your SAR immediately after submitting the FAFSA, or you will receive an email notification once it is processed. If you provided a valid email address, you may also receive a PDF version directly to your inbox. Check the "Confirmation Page" or your email for the direct link to the Federal Student Aid website.
Check for Errors
Review every line of the SAR carefully. Look for common mistakes such as misspelled names, incorrect Social Security numbers, or outdated tax information. If you spot an error, do not wait for your college to contact you. Log back into the FAFSA form and use the "Make Corrections" option to update the data. Once corrected, you will receive an updated SAR reflecting the changes.
Verify Your SAI
The Student Aid Index (SAI) on your SAR is the number your colleges will use to build your financial aid package. Ensure the SAI matches your expectations based on your family's financial situation. If the SAI seems incorrect due to data entry errors, correcting the underlying FAFSA data is the only way to fix it. Keep a copy of your final SAR for your records; you will need it when comparing aid offers from different schools.
If you have questions about your SAR or how to interpret your SAI, visit the Federal Student Aid website for detailed guides and troubleshooting tools. They offer specific resources for understanding how your aid eligibility is calculated.
Compare aid offers and choose loans
Once your financial aid award letters arrive, you will likely have multiple offers to review. Treat this like comparing job offers: look at the total cost, the type of money, and the repayment terms. The goal is to minimize high-interest debt while covering your tuition and living expenses.
Break down the award letter
Start by separating "gift aid" from "self-help aid." Gift aid includes grants and scholarships that do not need to be repaid. Self-help aid includes federal student loans and work-study positions. If an offer includes a loan, note whether it is a Direct Subsidized or Unsubsidized loan. Subsidized loans are better because the government pays the interest while you are in school. Unsubsidized loans accrue interest immediately.
Compare loan terms side-by-side
Different schools may offer different loan packages. Use a comparison table to see the real cost of each option. Look at the interest rate, origination fees, and repayment start date. A lower monthly payment might sound appealing, but a longer term often means you pay more interest over time. Always prioritize federal loans over private loans because federal options offer income-driven repayment and forgiveness programs.

Make your final selection
Accept the federal loans that cover your gap in funding first. If you still need more money, consider private loans only as a last resort. Private loans usually require a credit check and a cosigner, and they lack the flexible repayment options of federal loans. Before signing any promissory note, use a financial aid calculator to estimate your monthly payment after graduation. This helps you avoid taking on more debt than you can comfortably manage.
Set up repayment plans and repayment
Repayment begins the moment you graduate, leave school, or drop below half-time enrollment. Most federal student loans include a six-month grace period, but interest continues to accrue on unsubsidized loans during this time. Setting up your repayment plan early prevents unexpected balance growth and ensures you are enrolled in the correct program for your income.
Choose your repayment strategy
The standard 10-year plan offers the lowest total interest cost, but it requires higher monthly payments. If your income is lower than your loan payments, income-driven repayment (IDR) plans cap your monthly amount based on your earnings and family size. These plans extend the repayment term to 20 or 25 years, after which any remaining balance may be forgiven. You can switch between plans at any time through your servicer’s portal.
Select a loan servicer
Your loans are managed by a federal loan servicer, a company contracted by the Department of Education to handle billing, customer service, and repayment plans. You cannot choose your servicer; they are assigned based on your school and loan type. You will receive notification of your servicer’s name and contact information before your grace period ends. Log in to StudentAid.gov to view your servicer details and manage your accounts.
Prepare for your first payment
Before your grace period expires, take these steps to avoid default:
- Confirm your servicer’s contact information and log in to their website.
- Set up autopay to ensure payments are never missed and potentially reduce your interest rate by 0.25%.
- Review your loan terms, including interest rates and total balance.
- Calculate your monthly payment using the servicer’s repayment estimator.
-
Confirm servicer details
-
Set up autopay
-
Review loan terms
-
Calculate monthly payment
Frequently asked questions about FAFSA
Understanding the FAFSA process can feel overwhelming, but knowing the specifics helps you avoid costly delays. Here are the most common questions students and parents ask when navigating the 2026 form.
What is the FAFSA submission deadline?
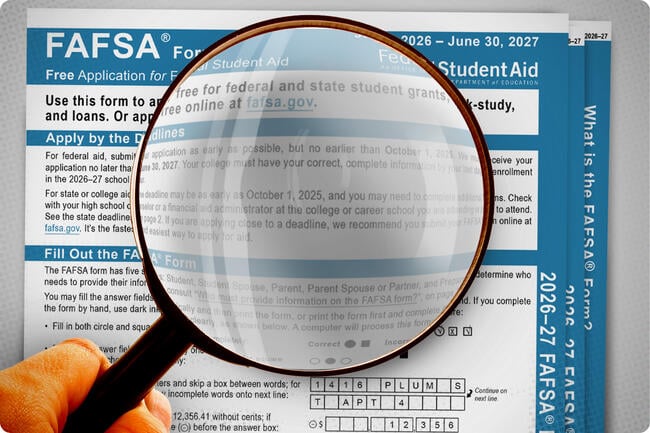
The federal FAFSA opens on October 1 each year for the following academic cycle. While the federal deadline is typically June 30, many states and colleges have much earlier priority deadlines, often between January and March. Missing these early dates can reduce your eligibility for state grants and institutional aid. Always check the specific deadline for every college on your list.
Do I need to submit a new FAFSA every year?
Yes. Financial aid is not automatic; you must submit a new FAFSA for each academic year you attend college. The information you provide is only valid for the specific award year. If your family’s financial situation changes significantly, such as job loss or high medical expenses, you can contact the financial aid office at your school to discuss a professional judgment review.
Can I get federal student loans without filling out the FAFSA?
No. To be eligible for any federal student loans, including Direct Subsidized or Unsubsidized Loans, you must complete the FAFSA. Private loans from banks or credit unions do not require the FAFSA, but they typically offer fewer protections and higher interest rates. Filling out the FAFSA is the only way to access federal aid, which includes grants, work-study, and federal loans.
No comments yet. Be the first to share your thoughts!