
Prepare your FSA ID and documents
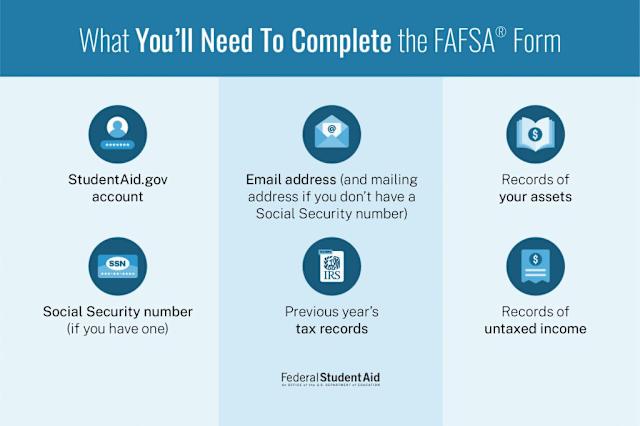
Before you open the FAFSA form, gather your credentials and data. This preparation prevents delays and stops you from getting stuck mid-form. You need an FSA ID for both the student and at least one parent if the student is dependent.
Create your FSA ID at studentaid.gov if you don't have one. You will need a government-issued ID, a Social Security number, and a valid email address. If you are a dependent student, your parents will also need their own FSA IDs to sign the form later.
While waiting for your FSA ID to activate, collect the following documents:
- Your Social Security number
- Your driver's license number (if you have one)
- Your federal income tax returns, W-2s, and other records of money earned
- Records of untaxed income, such as child support or veteran benefits
- A list of the colleges you want to send your FAFSA results to

Go to studentaid.gov and create your account. Use a personal email address you check regularly, as this is how the Department of Education will contact you about your application status.
Collect your most recent tax returns and W-2 forms. If you haven't filed taxes yet, use the IRS Data Retrieval Tool to transfer your tax information directly into the FAFSA form.
Look up the federal school codes for the colleges you are considering. You can add up to 20 schools to your FAFSA form at one time. If you need to add more later, you can log in and update your list.
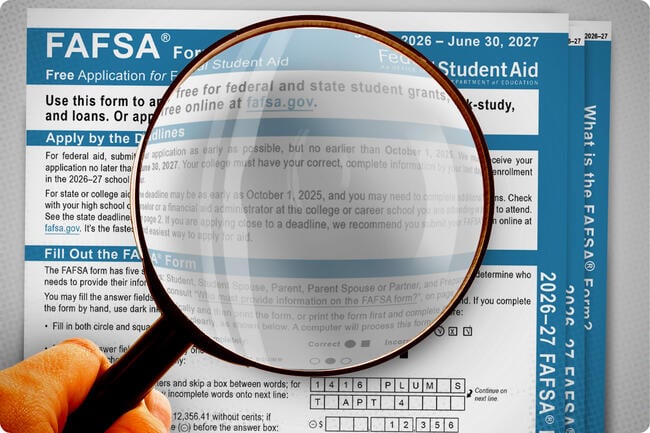
Fill out the 2026-27 FAFSA form
The new FAFSA form is structured differently than previous years, but the core goal remains the same: proving your financial need to qualify for aid. You will need to gather specific documents before starting, including your Social Security number, driver’s license (if applicable), and recent tax returns. Having these ready prevents the form from timing out due to inactivity.
Start by logging into studentaid.gov with your FSA ID. The application will guide you through a series of sections, beginning with personal information and school selection. Unlike the old form, you no longer need to manually search for every eligible school; the new system uses a more streamlined selection process based on your zip code and preferences.
When you reach the financial sections, pay close attention to the updated questions about family size and the number of family members in college. These fields directly impact your Expected Family Contribution (EFC), now called the Student Aid Index (SAI). Be precise with your numbers; even small errors can delay your aid offer or reduce the amount of grants and work-study you are eligible to receive.
Step-by-step walkthrough
Your FSA ID is your legal electronic signature. If you are a dependent student, one parent will also need to create their own FSA ID to sign the form. Verify your identity immediately, as this process can take up to three days. Do not wait until the last minute to resolve any identity verification issues.
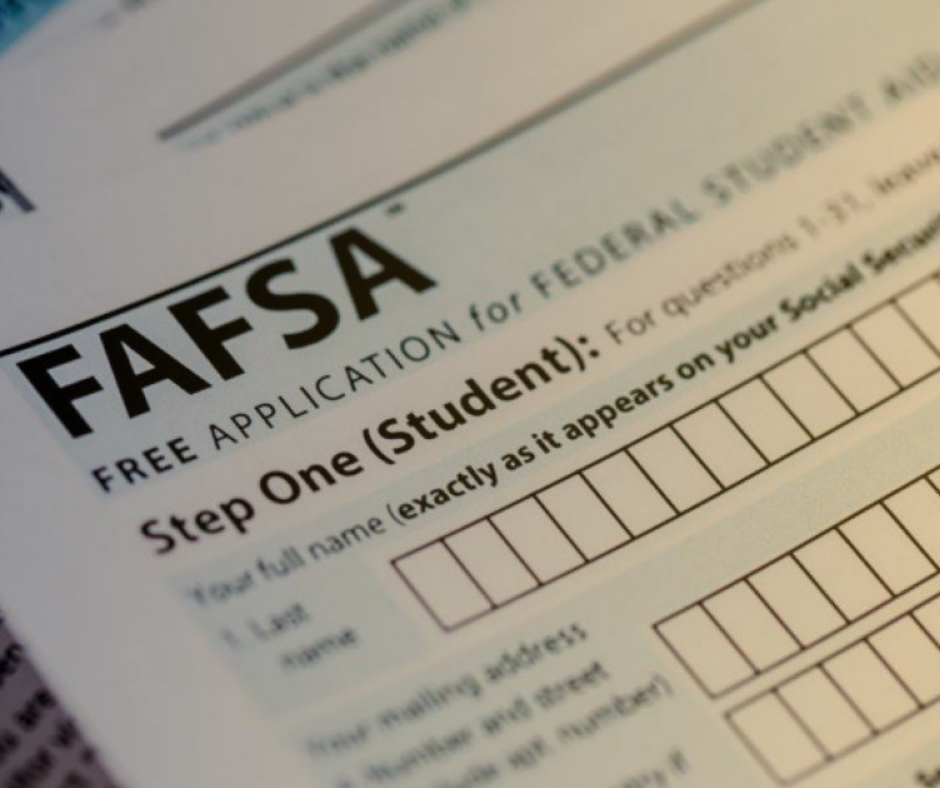
Input your name, date of birth, and citizenship status exactly as they appear on your government-issued ID. If your name has changed since your last ID was issued, you must update it with the Social Security Administration first. Incorrect names can cause major delays in processing your aid.

You can now search for colleges by name or zip code. Enter at least one school to ensure your data is sent, though you can add more later. Remember that some schools may have additional scholarship deadlines that are earlier than the general FAFSA deadline.

The 2026-27 form uses data from two years prior (tax year 2024). Use the IRS Data Retrieval Tool (DRT) to pull your tax information directly. This reduces errors and speeds up the review process. If you cannot use the DRT, you will need to manually enter your adjusted gross income and taxes paid.

Carefully review every section for accuracy. Both the student and a parent (if dependent) must electronically sign the form using their respective FSA IDs. Once signed, submit the form. You will receive a confirmation email with your Student Aid Index (SAI) within a few days.
Review and sign your application
Before you submit, treat the review screen like a final gate check. The system will display a summary of every section you completed. This is your last chance to catch typos, missing signatures, or mismatched Social Security numbers. If you spot an error, click the edit link next to the relevant section to return to that page.
Once the summary looks correct, you are ready to sign. Electronic signatures are legally binding, so treat them with the same care as a wet-ink signature. You will need your FSA ID to sign, just as you did at the start of the process. If you are a dependent student, one of your parents must also log in with their own FSA ID to sign the dependency section.
After signing, the system will generate a confirmation page. Do not close the window until you see the "Submission Successful" message. You can also find your status later by logging back into StudentAid.gov. This page serves as your proof of submission, so it is wise to take a screenshot or print it for your records.
Scroll through the summary to verify all personal, financial, and school data is accurate. Click "Edit" on any section that needs correction.

Enter your FSA ID credentials to apply your electronic signature. Dependent students must have a parent sign their portion as well.
Wait for the "Submission Successful" screen. Take a screenshot or print the page to keep for your records.
Read your award letter and Student Aid Report
Your Student Aid Report (SAR) is the starting point for understanding your financial aid eligibility. It summarizes the data you entered on the FAFSA and calculates your Expected Family Contribution (EFC). The SAR does not tell you how much aid you will receive; that comes from the individual colleges.
Once you receive your SAR, check it for accuracy. If any information is incorrect, contact the financial aid office at the schools you listed on your FAFSA. They can help you make corrections or provide updated documentation. Use the Federal Student Aid Handbook for detailed guidance on how to interpret your SAR and what to do if errors appear.
After the SAR is correct, you will receive award letters from each college. These letters break down the types of aid you qualify for. It is important to read these letters carefully to understand the difference between grants, work-study, and loans.
| Aid Type | Repayment Required | Source | Need-Based? |
|---|---|---|---|
| Grants | No | Federal or State Government | Yes |
| Work-Study | No | Federal or State Government | Yes |
| Subsidized Loans | No (while in school) | Federal Government | Yes |
| Unsubsidized Loans | Yes | Federal Government | No |
Compare loan costs carefully
Not all aid is free. Loans must be repaid with interest, which can significantly increase the total cost of your education. When comparing offers, look beyond the total amount awarded. Focus on the loan types and interest rates.
Federal Direct Subsidized Loans are often the best option because the government pays the interest while you are in school. Unsubsidized Loans accrue interest immediately. Private loans from banks or credit unions usually have higher interest rates and fewer repayment options than federal loans.
Navigate new repayment plans
The 2026 FAFSA update brings significant changes to how your monthly loan payments are calculated. The Department of Education has shifted the income base used for Income-Driven Repayment (IDR) plans, moving away from the previous "pay as you earn" metrics that often relied on older tax data. This adjustment aims to align your monthly obligations more closely with your current financial reality.
Under the new rules, the calculation window for your adjusted gross income has been shortened. Instead of looking back several years, the system now prioritizes the most recent tax year available through the IRS Data Retrieval Tool. This means your payment amount will reflect your current earnings more accurately, potentially lowering your monthly bill if your income has decreased or remained stable.
To understand the exact impact on your long-term costs, you can review the official Federal Student Aid Handbook, which details the revised formulas and eligibility thresholds for each IDR plan. The handbook provides the definitive breakdown of how the new income bases interact with your total loan balance and repayment term.
Avoid common FAFSA mistakes
Small errors on the 2026 FAFSA form can delay your aid package or reduce the amount you receive. Because the form handles sensitive financial data, the Department of Education’s validation systems flag discrepancies automatically. Catching these issues early ensures your application moves through the review process without unnecessary holds.
Double-check dependency status
Your dependency status determines whose financial information you must report. Most undergraduates under 24 are considered independent, but specific circumstances like orphanhood or active military service change this classification. Selecting the wrong status can invalidate your entire application. Review the official criteria on studentaid.gov to confirm your status before saving.
Match names and Social Security numbers exactly
Your FAFSA must match your Social Security Administration records precisely. Even minor spelling differences or missing middle initials can cause identity verification failures. Ensure the name and SSN on the form match your government-issued ID exactly. If you have recently changed your name, update your records with the SSA before starting the application.
Report all required assets accurately
The 2026-27 FAFSA form now asks for specific asset details, including cash, savings, and investment accounts. Omitting these fields or entering zero when assets exist can trigger a review. Conversely, reporting non-taxable assets incorrectly can inflate your Expected Family Contribution (EFC). Use your most recent tax returns and bank statements to verify these figures before submission.
After submitting, check your Student Aid Index (SAI) and confirmation page. Ensure all fields are complete and no validation errors remain. If you see a red flag, correct it immediately.
If you used your FSA ID, confirm that the identity verification was successful. Incomplete verification can delay the processing of your application by several weeks.
Colleges may request additional documentation if your data is incomplete. Respond promptly to any emails from your financial aid office to keep your aid package on track.
Final Checklist for 2026-27 Filers
Before you submit, run through this list to ensure your application is complete and accurate. Missing a single item can delay your financial aid offer.
-
Verify your FSA ID: Ensure you and your parents (if dependent) have active FSA IDs. If you forgot yours, use the recovery tool at studentaid.gov.
-
Check your SSN and name: These must match your Social Security card exactly. Typos here are the most common reason for application rejection.
-
List all colleges: Add at least five colleges to your "School List." Your information won't reach any school until you add its FAFSA code.
-
Sign the form: Both you and your parent (if applicable) must digitally sign the form. The signature is legally binding.
-
Submit and wait for confirmation: You will receive an email confirmation within 3-5 days. Check your spam folder if you don't see it.

No comments yet. Be the first to share your thoughts!